Tampilkan postingan dengan label how. Tampilkan semua postingan

This is how Offline viewing in YouTube will work

Minggu, 26 Januari 2014

0 komentar
YouTubes mobile apps are expected to get offline playback soon.
(Credit: Google)
As YouTube prepares offline video watching for a November update, it details for its partners how the feature will work, as well as indicating some fuzzy red lines around content.
The default setting for most uploads will be to include offline viewing as an option, according to a YouTube memo sent to its commercial upload partners obtained by AllThingsD. Uploaders can disable offline mode for their videos during the upload process or once the video is uploaded, and disabling offline viewing has some granular controls including region, asset, and across all the uploaders videos.
Offline views will be added to total view counts, ads will be shown, and the viewing must happen within 48 hours after a video has been selected for offline via a YouTube mobile app.
Once you connect to the Internet, the 48-hour limitation resets. As the memo explains, Googles plan is that you select a video for offline for the subway ride home or for a flight, it gets saved to your device, and you watch it before re-connecting. The company doesnt want to hold on to videos in perpetuity, at least not this way.
Google refused to comment for this story, with a spokesperson saying that the report is "speculative."
Google has not yet revealed all the goods on the feature, though. Theres no word on how many ads will be shown per video, nor if YouTube is preparing native apps for platforms that dont have one yet, such as Windows 8. And as AllThingsD notes, theres no mention of music videos, arguably the most popular category of video, or the movies and TV shows it offers for rent.
At the very least, this ought to be a boon to all the cat and dog video obsessives out there.
A shortened version of the full memo is below:
 Dear Partner,
Were writing to let you know about a new functionality that is currently scheduled to launch in November that impacts your content. This functionality is part of ongoing updates to give users more opportunities to enjoy videos and channels on YouTube mobile. The functionality is launching with all partners enabled but if you wish, you can disable now. Below is more information on the functionality and directions for how to disable.
Whats happening
On the YouTube app, users will be able, through "add to device" functionality available on videos and playlists, to designate certain content that they can watch for a short period of time when an internet connection is unavailable. With this, if a user experiences a loss of connectivity, they will still be able to watch the videos that theyve added to their device for a limited period of up to 48 hours. If the device is offline for more than 48 hours the content cannot be viewed offline until the device reconnects. Once connected, the offline window refreshes and the viewer is able to watch the content again.
How it works for viewers
From the watch page through the "add to device" functionality feature, viewers will be able to designate certain content that they can watch for a short period of time when they do not have connectivity. At the time when the user no longer has connectivity, they will be able to watch the videos and playlists they have added to their device by accessing the videos through an "on device" section of their guide.
How it works for partners: ads and viewcounts
Google in-stream ads will run in connection with the content, and views will be added to the total view count. Please note that other ad formats will not be supported, and, videos for rental or purchase will not be included in this functionality.
All content is enabled. But you can disable now
By default all of your content will be enabled for the functionality, but you can disable now before the functionality launches. You will be able to disable by: partner, and available before launch, by asset, video and country. When you disable at the content owner or partner level, we apply this policy across all your videos, regardless of whether they are enabled at the asset, video and country level. To ensure all your content is disabled, you should disable at the content owner or partner level.
Read More..

How to Root Galaxy S4 Canadian SGH I337M on Android 4 2 2 Jelly Bean Firmware

Selasa, 07 Januari 2014

0 komentar
Samsung Galaxy S4 (Canadian) SGH-I337M users who have already installed their devices with Android 4.2.2 Jelly Bean, may root their devices using the tutorial below.

This tutorial uses CF-Auto-Root file released by recognised XDA Developers, Chainfire. The CF-Auto-Root file allowing Galaxy S4 users to root their devices easily without depending on the firmware. It completely supports Android 4.2.2 Jelly Bean and future firmware as well.

Disclaimer: Rooting voids the warranty of your device. We and the developer of this rooting procedures shall not be held responsible if any undesirable outcomes may happen to your device. use of this root guide is solely at your own risk!

Pre-requisites
1) Install USB Driver for Samsung Galaxy S4 on the computer.
2) Enable USB Debugging Mode on the phone.
3) Make a backup of all your important data before following the guide.
4) Ensure the battery of the phone is charged more than 80 per cent.
5) The CF-Auto-Root file works only on Samsung Galaxy S4 (Canadian) SGH-I337M. Applying this on any incorrect variant will brick the device. Verify the model number of the Galaxy S4 by navigating to Settings >> About Phone.

File Required
1. CF-Auto-Root (Mirror Link) for Galaxy S4 (Canadian) SGH-I337M (CF-Auto-Root-jfltecan-jfltevl-sghi337m.zip)
2. Odin 3.07

Steps to Root Galaxy S4 (Canadian) SGH-I337M Running on Android 4.2.2 Jelly Bean Firmware
Step 1: Extract CF-Auto-Root and Odin 3.07 files using winrar/7zip/winzip or any other extracting tool.
Step 2: Switch off the Galaxy S4. Then boot the device into Download Mode by pressing and holding Volume Down + Home buttons together and then press the Power button until the device turns on. Now press the Volume Up button to enter Download Mode.
Step 3: Launch Odin on the computer.
Step 4: Connect the Galaxy S4 to the computer using USB cable while it is in the Download Mode. Wait until Odin detects the device. When the device is connected successfully, the ID: COM box will turn yellow with the COM port number. Additionally, the successful connected will be indicated by a message saying Added. If Odin fails to detect the device then re-install USB driver
Step 5: In Odin, click the PDA button and select the CF-Auto-Root-jfltecan-jfltevl-sghi337m.tar.md5 file.
Step 6: Verify that Auto Reboot and F.Reset Time checkboxes are selected in Odin. Also, ensure the Re-Partition option in Odin is not selected.
Step 7: Double-check and click Start in Odin. The installation process will now begin.
Step 8: Once flashing completed, your phone will restart and soon you will see a PASS message with green background in the left-most box at the very top of the Odin. You can now unplug the USB cable to disconnect your device from computer.

Samsung Galaxy S4 (Canadian) SGH-I337M running on Android 4.2.2 Jelly Bean firmware is now rooted successfully. You may now install any app that requires root permission.

Thanks to all fellas at XDA who first tried out this rooting technique. This method was originally posted via XDA-Developers original thread.
Read More..

How to Root Galaxy Win Grand Quattro I8552 on Android 4 1 2 Jelly Bean Firmware

Sabtu, 04 Januari 2014

0 komentar
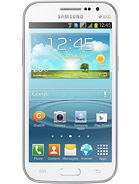
Samsung has released the latest Android 4.1.2 Jelly Bean update for Galaxy Win with model number I8552 also known as Galaxy Grand Quattro. The new official firmware is now available as an Over-The-Air (OTA) update as well as through Samsung KIES.

Samsung Galaxy Win I8552 users who have already installed their devices with Android 4.1.2 Jelly Bean, may root their devices using the tutorial below.

Disclaimer: Rooting voids the warranty of your device. We and the developer of this rooting procedures shall not be held responsible if any undesirable outcomes may happen to your device. use of this root guide is solely at your own risk!

Pre-Requisites
1. Install USB Drivers for Samsung Galaxy Win on your computer.
2. Enable USB Debugging Mode on the phone by navigating to Settings >> Developer Options.
3. Make a backup of all your important data before following the guide.
4. The Galaxy Win should be factory unlocked and not locked to any particular carrier.
5. Ensure the battery of the phone is charged more than 80 percent.
6. The ClockworkMod Recovery (CWM) and SuperSU files works only on Samsung Galaxy Win (GT-I8552). Applying these on any incorrect variant might brick the device. Verify the model number of the Galaxy Win by selecting Settings >> About Phone.

Files Required
1. CWM Recovery (Mirror Link)
2. SuperSU or the latest version
3. Odin 3.07

Steps to Install CWM Recovery on Samsung Galaxy Win I8552
Step 1: Extract Odin .zip files using winrar/7zip/winzip or any other extracting tool.
Step 2: Copy SuperSU .zip file to the SD card of the phone.
Step 3: Switch off the Galaxy Win. Then boot the device into Download Mode by pressing and holding Volume Down, Home and Power buttons together until a construction Android robot icon with a warning triangle appears on screen. Now press the Volume Up button to enter Download Mode.
Step 4: Run Odin on the computer as an Administrator.
Step 5: Connect the Galaxy Win to the computer using USB cable while it is in the Download Mode. Wait until Odin detects the device. When the device is connected successfully, the ID: COM box will turn to light blue with the COM port number. Additionally, the successful connected will be indicated by a message saying Added.

Note: If the Added message does not appear, then try re-install USB drivers or changing the port on the computer.

Step 6: In Odin, click the PDA and select the CWM Recovery .tar file. Verify that Auto-Reboot and Re-Partition options is NOT selected.
Step 7: Double-check and click Start in Odin. The installation process will now begin.
Step 8: Once installation process is completed, unplug the USB cable to disconnect it from computer. Then switch off the phone manually (Take out the battery and put it back in).

Steps to Root Galaxy Win I8552 by Installing SuperSU via CWM Recovery
Step 9: Boot the device into CWM Recovery by pressing and holding Volume Up, Home and Power buttons together.
Step 10: In CWM Recovery, select install zip from sdcard and then select choose zip from sdcard. Now, navigate to the SuperSU .zip file that you copied earlier and confirm the installation by selecting Yes.
Step 11: Once installation process is completed, return to main recovery menu and select reboot system now.

The Samsung Galaxy Win I8552, running official Android 4.1.2 Jelly Bean, is now rooted successfully. You can now install any app that requires root permission. Verify the root status of the device by downloading Root Checker app from Google Play Store.

Thanks to all fellas at XDA who first tried out this rooting technique. This root method was originally posted via XDA-Developers original thread.

Click here to know How to Update Galaxy Win I8552 with Android 4.1.2 XXAMK1 Jelly Bean official firmware.
Read More..

How to Root Galaxy Note 2 AT T SGH I317 on Android 4 1 2 Jelly Bean Firmware

0 komentar
Samsung Galaxy Note 2 (AT&T) SGH-I317 users who have already updated their devices with Android 4.1.2 Jelly Bean, may root their devices using the tutorial below.

This tutorial uses CF-Auto-Root file released by recognised XDA Developers, Chainfire. The CF-Auto-Root file allowing Galaxy Note 2 users to root their devices easily without depending on the firmware. It completely supports Android 4.1.2 Jelly Bean and future firmware as well. Head over to the CF-Auto-Root main thread to learn more about the root method.

Note: Using this root increases your flash counter. The flash counter keeps track of how many custom firmwares you have flashed, as this voids warranty. Triangle Away can be used to reset the flash counter after installing CF-Auto-Root.

Disclaimer: Rooting voids the warranty of your device. We and the developer of this rooting procedures shall not be held responsible if any undesirable outcomes may happen to your device. use of this root guide is solely at your own risk!

Pre-requisites
1. Install USB Driver for Samsung Galaxy Note 2 on the computer.
2. Enable USB Debugging Mode on the phone by navigating to Settings >> Developer Options (Android 4.0 or later) or go to Settings >> Applications >> Development (Android 2.3 or earlier).
3. Make a backup of all your important data before following the guide.
4. Ensure the battery of the phone is charged more than 80 per cent.
5. The CF-Auto-Root file works only on Samsung Galaxy Note 2 (AT&T) SGH-I317. Applying this to any incorrect variant might brick the device. Verify the model number of the Galaxy Note 2 by navigating to Settings >> About Phone.

File Required
1. CF-Auto-Root (Mirror Link) for Galaxy Note 2 (AT&T) SGH-I317 (CF-Auto-Root-t0lteatt-t0lteatt-samsungsghi317.zip)
2. Odin 3.07

Steps to Root Galaxy Note 2 (AT&T) SGH-I317 Running on Android 4.1.2 Jelly Bean Firmware
Step 1: Extract CF-Auto-Root and Odin 3.07 files using winrar/7zip/winzip or any other extracting tool.
Step 2: Switch off the Galaxy Note 2. Then boot the device into Download Mode by pressing and holding Volume Down + Home buttons together and then press the Power button until the device turns on. Now press the Volume Up button to enter Download Mode.
Step 3: Launch Odin on the computer.
Step 4: Connect the Galaxy Note 2 to the computer using USB cable while it is in the Download Mode. Wait until Odin detects the device. When the device is connected successfully, the ID: COM box will turn yellow with the COM port number. Additionally, the successful connected will be indicated by a message saying Added. If Odin fails to detect the device then re-install USB driver
Step 5: In Odin, click the PDA button and select the CF-Auto-Root-t0lteatt-t0lteatt-samsungsghi317.tar.md5 file.
Step 6: Verify that Auto Reboot and F.Reset Time checkboxes are selected in Odin. Also, ensure the Re-Partition option in Odin is not selected.
Step 7: Double-check and click Start in Odin. The installation process will now begin.
Step 8: Once flashing completed, your phone will restart and soon you will see a PASS message with green background in the left-most box at the very top of the Odin. You can now unplug the USB cable to disconnect your device from computer.

Samsung Galaxy Note 2 (AT&T) SGH-I317 running on Android 4.1.2 Jelly Bean firmware is now rooted successfully. You can now install any app that requires root permission. Verify the root status of the device by downloading Root Checker app from Google Play Store.

Thanks to all fellas at XDA who first tried out this rooting technique. This method was originally posted via XDA-Developers original thread.

Click here to know How to Update Galaxy Note 2 (AT&T) SGH-I317 with Android 4.1.2 Jelly Bean official firmware.
Read More..

How to Root Galaxy Note 2 Sprint SPH L900 on Android 4 3 Jelly Bean Firmware

Jumat, 03 Januari 2014

0 komentar
Samsung has begun rolling out the Android 4.3 Jelly Bean update for the Sprint subscribers of the Galaxy Note 2 (SPH-L900). The new official firmware is now available as an Over-The-Air (OTA) update as well as through Samsung KIES.

Samsung Galaxy Note 2 (Sprint) SPH-L900 users who have already updated their devices with Android 4.3 Jelly Bean, may root their devices using the tutorial below.

This tutorial uses CF-Auto-Root file released by Elite Recognized XDA-Developers, Chainfire. The CF-Auto-Root file allowing Galaxy Note 2 users to root their devices easily without depending on the firmware. It completely supports Android 4.3 Jelly Bean and future firmware as well. Head over to the CF-Auto-Root main thread to learn more about the root method.

Disclaimer: Rooting voids the warranty of your device. We and the developer of this rooting procedures shall not be held responsible if any undesirable outcomes may happen to your device. use of this root guide is solely at your own risk!

Pre-requisites
1. Install USB Driver for Samsung Galaxy Note 2 on the computer.
2. Enable USB Debugging Mode on the phone by navigating to Settings >> Developer Options.
3. Make a backup of all your important data before following the guide.
4. Ensure the battery of the phone is charged more than 80 percent.
5. The CF-Auto-Root file works only on the Sprint version of the Samsung Galaxy Note 2 (SPH-L900). Applying this to any incorrect variant might brick the device. Verify the model number of the Galaxy Note 2 by navigating to Settings >> About Phone.

Files Required
1. CF-Auto-Root for Galaxy Note 2 (Sprint) SPH-L900 (CF-Auto-Root-t0ltespr-t0ltespr-sphl900.zip)
2. Odin 3.07

Steps to Root Galaxy Note 2 (Sprint) SPH-L900 Running on Android 4.3 Jelly Bean Firmware
Step 1: Extract CF-Auto-Root and Odin 3.07 files using winrar/7zip/winzip or any other extracting tool.
Step 2: Switch off the Galaxy Note 2. Then boot the device into Download Mode by pressing and holding Volume Down, Home and Power buttons together until a construction Android robot icon with a warning triangle appears on screen. Now press the Volume Up button to enter Download Mode.
Step 3: Launch Odin on the computer as an Administrator.
Step 4: Connect the Galaxy Note 2 to the computer using USB cable while it is in the Download Mode. Wait until Odin detects the device. When the device is connected successfully, the ID: COM box will turn to light blue with the COM port number. Additionally, the successful connected will be indicated by a message saying Added.

Note: If the Added message does not appear, then try re-install USB drivers or changing the port on the computer.

Step 5: In Odin, click the PDA button and select the CF-Auto-Root-t0ltespr-t0ltespr-sphl900.tar.md5 file.
Step 6: Verify that Auto Reboot and F. Reset Time checkboxes are selected in Odin. Also, ensure the Re-Partition option is NOT selected.
Step 7: Double-check and click Start button in Odin. The installation process will now begin.
Step 8: Once the installation process is completed, your phone will restart and soon you will see a PASS message with green background in the left-most box at the very top of the Odin. You can now unplug the USB cable to disconnect your device from the computer.

Samsung Galaxy Note 2 (Sprint) SPH-L900 running on Android 4.3 Jelly Bean firmware is now rooted successfully. You can now install any app that requires root permission. Verify the root status of the device by downloading Root Checker app from Google Play Store.

Thanks to all fellas at XDA who first tried out this rooting technique. This method was originally posted via XDA-Developers original thread.
Read More..

Copyright © 2010-2022 Android Apk | Powered By Blogger