Tampilkan postingan dengan label galaxy. Tampilkan semua postingan

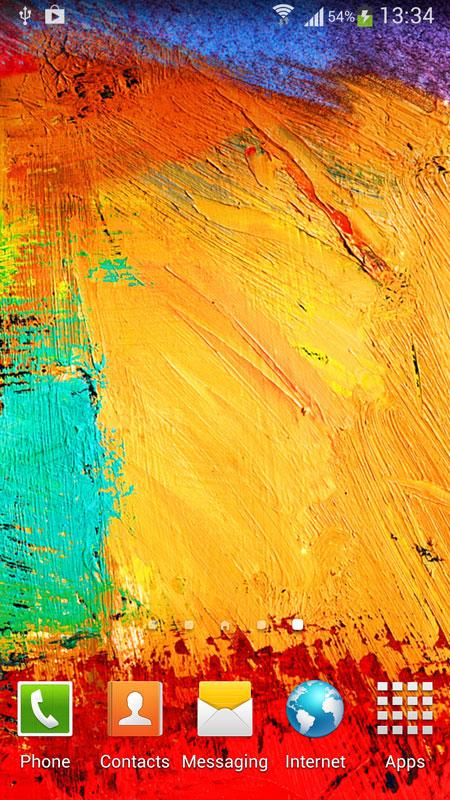
Galaxy Note 3 Live Wallpaper v1 0 1 apk

Sabtu, 19 November 2016

0 komentar

Description
Download free Galaxy Note 3 live wallpaper with water ripple effect and floating light particles.Inspired by new Samsung Galaxy Note 3 background.

To use:
Home -> Menu -> Wallpapers -> Live Wallpapers

Note:
If your wallpaper resets to default after reboot, you will need put the app on phone instead of SD card.
Change Log

Images


Downloads
Download

 
Read More..

How to Root Galaxy S4 Canadian SGH I337M on Android 4 2 2 Jelly Bean Firmware

Selasa, 07 Januari 2014

0 komentar
Samsung Galaxy S4 (Canadian) SGH-I337M users who have already installed their devices with Android 4.2.2 Jelly Bean, may root their devices using the tutorial below.

This tutorial uses CF-Auto-Root file released by recognised XDA Developers, Chainfire. The CF-Auto-Root file allowing Galaxy S4 users to root their devices easily without depending on the firmware. It completely supports Android 4.2.2 Jelly Bean and future firmware as well.

Disclaimer: Rooting voids the warranty of your device. We and the developer of this rooting procedures shall not be held responsible if any undesirable outcomes may happen to your device. use of this root guide is solely at your own risk!

Pre-requisites
1) Install USB Driver for Samsung Galaxy S4 on the computer.
2) Enable USB Debugging Mode on the phone.
3) Make a backup of all your important data before following the guide.
4) Ensure the battery of the phone is charged more than 80 per cent.
5) The CF-Auto-Root file works only on Samsung Galaxy S4 (Canadian) SGH-I337M. Applying this on any incorrect variant will brick the device. Verify the model number of the Galaxy S4 by navigating to Settings >> About Phone.

File Required
1. CF-Auto-Root (Mirror Link) for Galaxy S4 (Canadian) SGH-I337M (CF-Auto-Root-jfltecan-jfltevl-sghi337m.zip)
2. Odin 3.07

Steps to Root Galaxy S4 (Canadian) SGH-I337M Running on Android 4.2.2 Jelly Bean Firmware
Step 1: Extract CF-Auto-Root and Odin 3.07 files using winrar/7zip/winzip or any other extracting tool.
Step 2: Switch off the Galaxy S4. Then boot the device into Download Mode by pressing and holding Volume Down + Home buttons together and then press the Power button until the device turns on. Now press the Volume Up button to enter Download Mode.
Step 3: Launch Odin on the computer.
Step 4: Connect the Galaxy S4 to the computer using USB cable while it is in the Download Mode. Wait until Odin detects the device. When the device is connected successfully, the ID: COM box will turn yellow with the COM port number. Additionally, the successful connected will be indicated by a message saying Added. If Odin fails to detect the device then re-install USB driver
Step 5: In Odin, click the PDA button and select the CF-Auto-Root-jfltecan-jfltevl-sghi337m.tar.md5 file.
Step 6: Verify that Auto Reboot and F.Reset Time checkboxes are selected in Odin. Also, ensure the Re-Partition option in Odin is not selected.
Step 7: Double-check and click Start in Odin. The installation process will now begin.
Step 8: Once flashing completed, your phone will restart and soon you will see a PASS message with green background in the left-most box at the very top of the Odin. You can now unplug the USB cable to disconnect your device from computer.

Samsung Galaxy S4 (Canadian) SGH-I337M running on Android 4.2.2 Jelly Bean firmware is now rooted successfully. You may now install any app that requires root permission.

Thanks to all fellas at XDA who first tried out this rooting technique. This method was originally posted via XDA-Developers original thread.
Read More..

How to Root Galaxy Win Grand Quattro I8552 on Android 4 1 2 Jelly Bean Firmware

Sabtu, 04 Januari 2014

0 komentar
Samsung has released the latest Android 4.1.2 Jelly Bean update for Galaxy Win with model number I8552 also known as Galaxy Grand Quattro. The new official firmware is now available as an Over-The-Air (OTA) update as well as through Samsung KIES.

Samsung Galaxy Win I8552 users who have already installed their devices with Android 4.1.2 Jelly Bean, may root their devices using the tutorial below.

Disclaimer: Rooting voids the warranty of your device. We and the developer of this rooting procedures shall not be held responsible if any undesirable outcomes may happen to your device. use of this root guide is solely at your own risk!

Pre-Requisites
1. Install USB Drivers for Samsung Galaxy Win on your computer.
2. Enable USB Debugging Mode on the phone by navigating to Settings >> Developer Options.
3. Make a backup of all your important data before following the guide.
4. The Galaxy Win should be factory unlocked and not locked to any particular carrier.
5. Ensure the battery of the phone is charged more than 80 percent.
6. The ClockworkMod Recovery (CWM) and SuperSU files works only on Samsung Galaxy Win (GT-I8552). Applying these on any incorrect variant might brick the device. Verify the model number of the Galaxy Win by selecting Settings >> About Phone.

Files Required
1. CWM Recovery (Mirror Link)
2. SuperSU or the latest version
3. Odin 3.07

Steps to Install CWM Recovery on Samsung Galaxy Win I8552
Step 1: Extract Odin .zip files using winrar/7zip/winzip or any other extracting tool.
Step 2: Copy SuperSU .zip file to the SD card of the phone.
Step 3: Switch off the Galaxy Win. Then boot the device into Download Mode by pressing and holding Volume Down, Home and Power buttons together until a construction Android robot icon with a warning triangle appears on screen. Now press the Volume Up button to enter Download Mode.
Step 4: Run Odin on the computer as an Administrator.
Step 5: Connect the Galaxy Win to the computer using USB cable while it is in the Download Mode. Wait until Odin detects the device. When the device is connected successfully, the ID: COM box will turn to light blue with the COM port number. Additionally, the successful connected will be indicated by a message saying Added.

Note: If the Added message does not appear, then try re-install USB drivers or changing the port on the computer.

Step 6: In Odin, click the PDA and select the CWM Recovery .tar file. Verify that Auto-Reboot and Re-Partition options is NOT selected.
Step 7: Double-check and click Start in Odin. The installation process will now begin.
Step 8: Once installation process is completed, unplug the USB cable to disconnect it from computer. Then switch off the phone manually (Take out the battery and put it back in).

Steps to Root Galaxy Win I8552 by Installing SuperSU via CWM Recovery
Step 9: Boot the device into CWM Recovery by pressing and holding Volume Up, Home and Power buttons together.
Step 10: In CWM Recovery, select install zip from sdcard and then select choose zip from sdcard. Now, navigate to the SuperSU .zip file that you copied earlier and confirm the installation by selecting Yes.
Step 11: Once installation process is completed, return to main recovery menu and select reboot system now.

The Samsung Galaxy Win I8552, running official Android 4.1.2 Jelly Bean, is now rooted successfully. You can now install any app that requires root permission. Verify the root status of the device by downloading Root Checker app from Google Play Store.

Thanks to all fellas at XDA who first tried out this rooting technique. This root method was originally posted via XDA-Developers original thread.

Click here to know How to Update Galaxy Win I8552 with Android 4.1.2 XXAMK1 Jelly Bean official firmware.
Read More..

How to Root Galaxy Note 2 AT T SGH I317 on Android 4 1 2 Jelly Bean Firmware

0 komentar
Samsung Galaxy Note 2 (AT&T) SGH-I317 users who have already updated their devices with Android 4.1.2 Jelly Bean, may root their devices using the tutorial below.

This tutorial uses CF-Auto-Root file released by recognised XDA Developers, Chainfire. The CF-Auto-Root file allowing Galaxy Note 2 users to root their devices easily without depending on the firmware. It completely supports Android 4.1.2 Jelly Bean and future firmware as well. Head over to the CF-Auto-Root main thread to learn more about the root method.

Note: Using this root increases your flash counter. The flash counter keeps track of how many custom firmwares you have flashed, as this voids warranty. Triangle Away can be used to reset the flash counter after installing CF-Auto-Root.

Disclaimer: Rooting voids the warranty of your device. We and the developer of this rooting procedures shall not be held responsible if any undesirable outcomes may happen to your device. use of this root guide is solely at your own risk!

Pre-requisites
1. Install USB Driver for Samsung Galaxy Note 2 on the computer.
2. Enable USB Debugging Mode on the phone by navigating to Settings >> Developer Options (Android 4.0 or later) or go to Settings >> Applications >> Development (Android 2.3 or earlier).
3. Make a backup of all your important data before following the guide.
4. Ensure the battery of the phone is charged more than 80 per cent.
5. The CF-Auto-Root file works only on Samsung Galaxy Note 2 (AT&T) SGH-I317. Applying this to any incorrect variant might brick the device. Verify the model number of the Galaxy Note 2 by navigating to Settings >> About Phone.

File Required
1. CF-Auto-Root (Mirror Link) for Galaxy Note 2 (AT&T) SGH-I317 (CF-Auto-Root-t0lteatt-t0lteatt-samsungsghi317.zip)
2. Odin 3.07

Steps to Root Galaxy Note 2 (AT&T) SGH-I317 Running on Android 4.1.2 Jelly Bean Firmware
Step 1: Extract CF-Auto-Root and Odin 3.07 files using winrar/7zip/winzip or any other extracting tool.
Step 2: Switch off the Galaxy Note 2. Then boot the device into Download Mode by pressing and holding Volume Down + Home buttons together and then press the Power button until the device turns on. Now press the Volume Up button to enter Download Mode.
Step 3: Launch Odin on the computer.
Step 4: Connect the Galaxy Note 2 to the computer using USB cable while it is in the Download Mode. Wait until Odin detects the device. When the device is connected successfully, the ID: COM box will turn yellow with the COM port number. Additionally, the successful connected will be indicated by a message saying Added. If Odin fails to detect the device then re-install USB driver
Step 5: In Odin, click the PDA button and select the CF-Auto-Root-t0lteatt-t0lteatt-samsungsghi317.tar.md5 file.
Step 6: Verify that Auto Reboot and F.Reset Time checkboxes are selected in Odin. Also, ensure the Re-Partition option in Odin is not selected.
Step 7: Double-check and click Start in Odin. The installation process will now begin.
Step 8: Once flashing completed, your phone will restart and soon you will see a PASS message with green background in the left-most box at the very top of the Odin. You can now unplug the USB cable to disconnect your device from computer.

Samsung Galaxy Note 2 (AT&T) SGH-I317 running on Android 4.1.2 Jelly Bean firmware is now rooted successfully. You can now install any app that requires root permission. Verify the root status of the device by downloading Root Checker app from Google Play Store.

Thanks to all fellas at XDA who first tried out this rooting technique. This method was originally posted via XDA-Developers original thread.

Click here to know How to Update Galaxy Note 2 (AT&T) SGH-I317 with Android 4.1.2 Jelly Bean official firmware.

Read More..

How to Root Galaxy Note 2 Sprint SPH L900 on Android 4 3 Jelly Bean Firmware

Jumat, 03 Januari 2014

0 komentar
Samsung has begun rolling out the Android 4.3 Jelly Bean update for the Sprint subscribers of the Galaxy Note 2 (SPH-L900). The new official firmware is now available as an Over-The-Air (OTA) update as well as through Samsung KIES.

Samsung Galaxy Note 2 (Sprint) SPH-L900 users who have already updated their devices with Android 4.3 Jelly Bean, may root their devices using the tutorial below.

This tutorial uses CF-Auto-Root file released by Elite Recognized XDA-Developers, Chainfire. The CF-Auto-Root file allowing Galaxy Note 2 users to root their devices easily without depending on the firmware. It completely supports Android 4.3 Jelly Bean and future firmware as well. Head over to the CF-Auto-Root main thread to learn more about the root method.

Disclaimer: Rooting voids the warranty of your device. We and the developer of this rooting procedures shall not be held responsible if any undesirable outcomes may happen to your device. use of this root guide is solely at your own risk!

Pre-requisites
1. Install USB Driver for Samsung Galaxy Note 2 on the computer.
2. Enable USB Debugging Mode on the phone by navigating to Settings >> Developer Options.
3. Make a backup of all your important data before following the guide.
4. Ensure the battery of the phone is charged more than 80 percent.
5. The CF-Auto-Root file works only on the Sprint version of the Samsung Galaxy Note 2 (SPH-L900). Applying this to any incorrect variant might brick the device. Verify the model number of the Galaxy Note 2 by navigating to Settings >> About Phone.

Files Required
1. CF-Auto-Root for Galaxy Note 2 (Sprint) SPH-L900 (CF-Auto-Root-t0ltespr-t0ltespr-sphl900.zip)
2. Odin 3.07

Steps to Root Galaxy Note 2 (Sprint) SPH-L900 Running on Android 4.3 Jelly Bean Firmware
Step 1: Extract CF-Auto-Root and Odin 3.07 files using winrar/7zip/winzip or any other extracting tool.
Step 2: Switch off the Galaxy Note 2. Then boot the device into Download Mode by pressing and holding Volume Down, Home and Power buttons together until a construction Android robot icon with a warning triangle appears on screen. Now press the Volume Up button to enter Download Mode.
Step 3: Launch Odin on the computer as an Administrator.
Step 4: Connect the Galaxy Note 2 to the computer using USB cable while it is in the Download Mode. Wait until Odin detects the device. When the device is connected successfully, the ID: COM box will turn to light blue with the COM port number. Additionally, the successful connected will be indicated by a message saying Added.

Note: If the Added message does not appear, then try re-install USB drivers or changing the port on the computer.

Step 5: In Odin, click the PDA button and select the CF-Auto-Root-t0ltespr-t0ltespr-sphl900.tar.md5 file.
Step 6: Verify that Auto Reboot and F. Reset Time checkboxes are selected in Odin. Also, ensure the Re-Partition option is NOT selected.
Step 7: Double-check and click Start button in Odin. The installation process will now begin.
Step 8: Once the installation process is completed, your phone will restart and soon you will see a PASS message with green background in the left-most box at the very top of the Odin. You can now unplug the USB cable to disconnect your device from the computer.

Samsung Galaxy Note 2 (Sprint) SPH-L900 running on Android 4.3 Jelly Bean firmware is now rooted successfully. You can now install any app that requires root permission. Verify the root status of the device by downloading Root Checker app from Google Play Store.

Thanks to all fellas at XDA who first tried out this rooting technique. This method was originally posted via XDA-Developers original thread.
Read More..

Apps AccuWeather widget from Galaxy Pocket Working on Galaxy Y

Rabu, 14 Agustus 2013

0 komentar
This is the stock weather widget from Galaxy Pocket. Tested working on Galaxy Y. Just follow the simple extractions on how to install it.

Galaxy Pocket Accuweather Widget

Galaxy Pocket here in the Philippines is becoming more popular for android phone users. Even though not a high end device, people just dont seem to care as long as its android.

You can incorporate system apks from that device to our galaxy y. Just make sure you know what youre doing. One of the system apks that you can install is the weather widget.

Once downloaded move it to root of sd card (see video page for tutorial)
Always make backup of original apk in case you need to revert.


How to install this:

Do not install this like regular apk (It will give you an error).

You need to download Root Explorer

- Using Root explorer you need to move the apk to system/app
- Once moved, Long press apk to bring out the options, look for "set permission"
- select it and tick rw r r (see tweaks page on how to set permissions)
- Once done, simply reboot

Using the widget
- long press screen
- tap widget
- select weather widget


.
Read More..

Samsung I9300 Galaxy S III

Senin, 12 Agustus 2013

0 komentar
Samsung I9300 Galaxy S III merupakan smartphone Android yang paling ditunggu-tunggu kehadiran para pecinta gadget Android yang haus akan teknologi tinggi. Setelah sebelumnya hanya disebutkan dengan nama "The Next Galaxy", ponsel Samsung terbaru resmi akan mengusung nama Galaxy S III atau Galaxy S3. Galaxy S III menggunakan prosesor quad-core Exnynos 1,4 Ghz dan layar Super AMOLED sebesar 4,8 inci (1280 x 720). Smartphone dengan bobot 133 gram ini memiliki kamera depan 8 MP dan kamera depan 1,9 MP.

harga samsung galaxy S III, spesifikasi dan fitur hp galaxy s3, kehebatan handphone galaxy s III di genggaman tangan, kelebihan dan kelemahan Galaxy S 3 warna

Selain itu, smartphone dengan ketebalan 8,6 mm ini
akan dibekali dengan baterai berkapasitas 2100
mAH dan tersedia dalam tiga pilihan kapasitas,
yaitu 16 GB, 32 GB, dan 64 GB. Terdapat juga slot
MicroSD yang mendukung hingga kapasitas 128 GB. Pada kesempatan yang sama, Samsung juga
memperkenalkan fitur pengenalan suara, S Voice.

S Voice bekerja dengan mengenali perintah suara pengguna, dapat menjalankan perintah untuk memainkan lagu, mengatur volume, mengirim SMS atau e-mail, dan memotret. Fitur ini bisa disebut mirip dengan yang dimiliki Apple di iPhone 4S, yaitu Siri.

harga samsung galaxy S III, spesifikasi dan fitur hp galaxy s3, kehebatan handphone galaxy s III, kelebihan dan kelemahan Galaxy S 3

Galaxy S III tersedia dalam dua warna, yaitu pebble blue dan marble white. Pada 29 Mei, Eropa akan menjadi wilayah pertama yang mendapatkan smartphone yang menggunakan Android 4.0 (Ice Cream Sandwich) ini, setelah itu baru akan didistribusikan di Asia, Timur Tengah, dan Afrika.

harga samsung galaxy S III, spesifikasi dan fitur hp galaxy s3, kehebatan handphone galaxy s III, kelebihan dan kelemahan Galaxy S 3

Kelebihan dan Kelemahan Samsung Galaxy S III

Poin Plus
- Bodi tipis 8.6 mm hanya terpaut 0.1 mm lebih tipis dari Galaxy S II
- Layar beresolusi HD 720p ukuran 4.8 inci (306 ppi) dilengkapi Gorilla Glass 2 yang lebih tangguh dan lebih tipis dibanding Gorilla Glass biasa
- Kapasitas memori 16, 32, 64GB dengan slot microSD sampai 64GB
- Bluetooth v4.0 seperti di iPhone 4S
- Android v4.0.4 ICS dengan prosesor 1.4 GHz Quad Core + 1GB RAM
- Baterai 2100 mAh

Poin Minus
- Kamera masih 8MP rasanya kurang wah untuk ponsel flangship, tapi kita lihat dulu kejutan apa yang akan diberikan kamera Galaxy S III yang cuma 8MP ini.
- Kerapatan warna sebesar 306ppi itu artinya masih di bawah retina display nya iPhone (330ppi), bahkan jauh di bawah Sony Xperia S dengan kerapatan layar 342 ppi.

harga samsung galaxy S III, spesifikasi dan fitur hp galaxy s3, kehebatan handphone galaxy s III, kelebihan dan kelemahan Galaxy S 3
Read More..

Copyright © 2010-2022 Android Apk | Powered By Blogger